Inner Skills 9: Database
十、Supabase
10.1 核心概念
💡
我见过太多技术小白被后端开发这座大山给劝退了,辛辛苦苦学了一堆前端,结果卡在数据库、API、用户系统这些"拦路虎"上。
别急,我要告诉你一个秘密武器------Supabase!这玩意儿简直就是独立开发者的大救星! 我自己用了三年!

为啥我坚定推荐 Supabase?就一个字,爽!
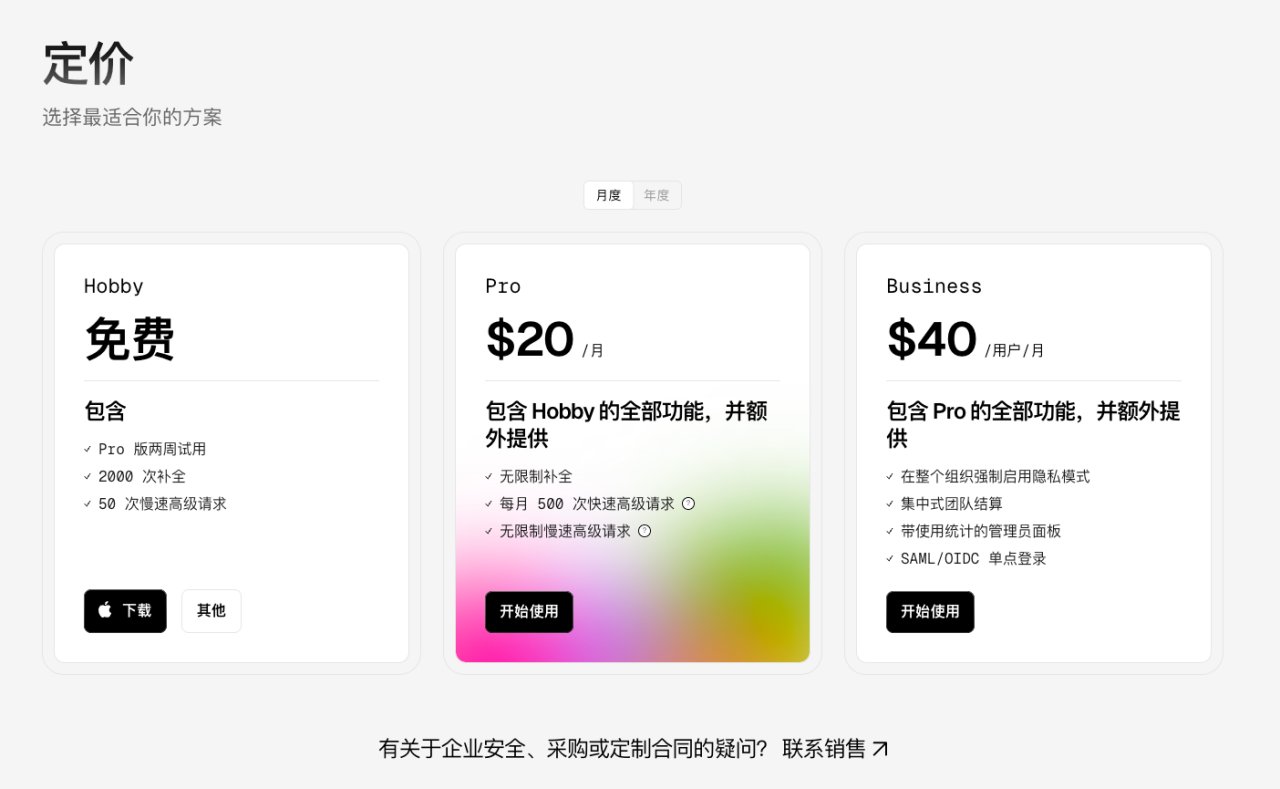
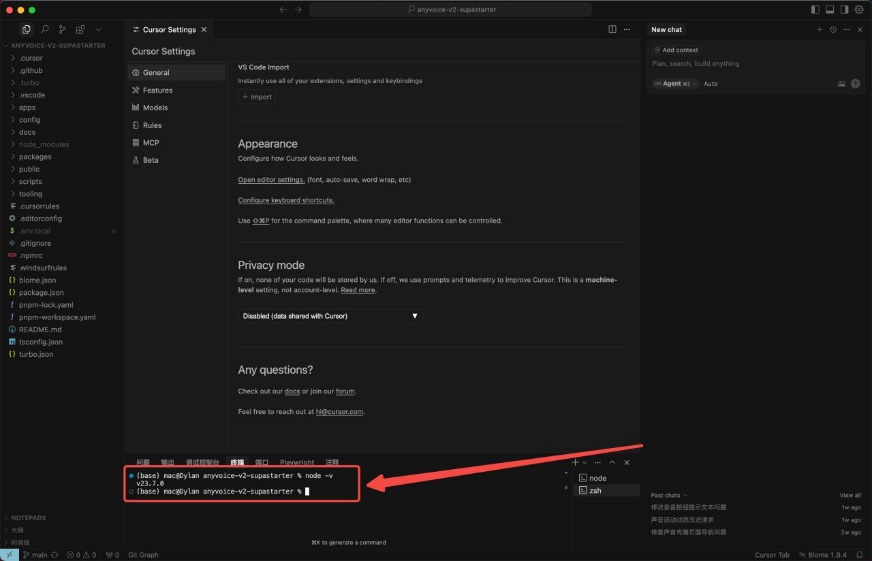
起步门槛低到离谱:你敢信?3 分钟就能创建一个生产级数据库!我第一次接触时简直惊呆了,比买个淘宝账号还简单,用户少的时候,还不要钱!
全家桶服务:数据库、身份验证(包括登录、注册、社交媒体登录)、存储、实时功能、邮件功能,全都有!别问,问就是"一把梭",省心!
不付钱也能白嫖很久:初期用户少,完全够用。等产品赚钱了,再用它的付费套餐,也不贵;等用户特别多了,还可以考虑自己租用服务器来部署 Supabase 的开源版本,无缝迁移。
核心界面介绍
登录后界面:进入组织界面
进入组织后,查看该组织下的全部项目
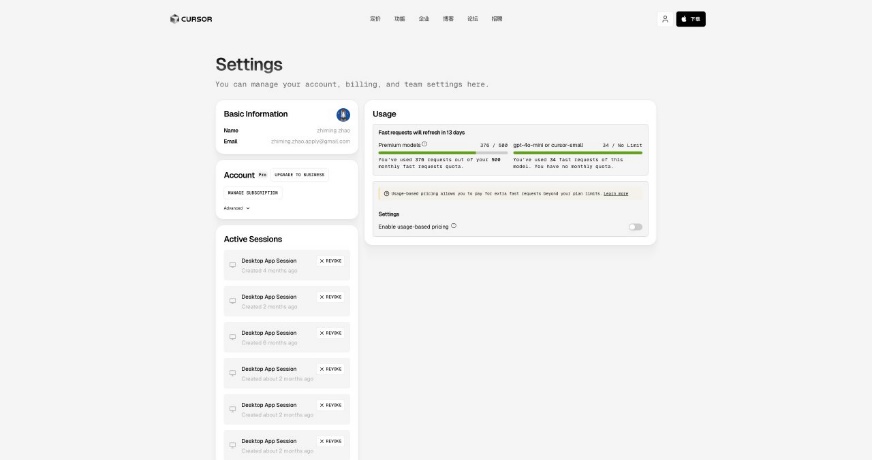
usage 界面,查看当前用量
setting 界面,查看基础设置
进入项目界面
📌
查看数据库表
创建数据库表
💡
配置用户登陆
📌
获取数据库配置信息


推荐一些官方教程
Supabase 官方入门指南(NextJS 版)
Supabase 官方示例代码和教程(NextJS 版)
https://supabase.com/docs/guides/getting-started
请大家跟着这个链接,一步一步做完。
10.2 实战项目
💡
由于本章节代码量大,环节较多,可直接使用代码复制版本
supabase实战项目-可复制代码版本
入门项目
💡
此处为 Supabase 官方示例代码和教程(NextJS 版)
https://Supabase.com/docs/guides/getting-started/tutorials/with-nextJS
助教的代码仓库:https://github.com/dylan-zzm/supabase-nextjs
目标描述
This tutorial demonstrates how to build a basic user management app. The app authenticates and identifies the user, stores their profile information in the database, and allows the user to log in, update their profile details, and upload a profile photo. The app uses:
本教程演示了如何构建一个基本的用户管理应用。该应用可以验证和识别用户,将用户资料信息存储在数据库中,并允许用户登录、更新个人资料详情和上传个人照片。该应用使用:
Project setup 项目设置
Create a project# 创建项目#
Create a new project in the Supabase Dashboard. 在 Supabase 仪表板中创建一个新项目。
Enter your project details. 输入您的项目详细信息。
Wait for the new database to launch. 等待新数据库启动。
Set up the database schema# 设置数据库模式
Go to the SQL Editor page in the Dashboard. 前往仪表板中的 SQL 编辑器页面。
Click User Management Starter. 点击用户管理入门
Click Run. 点击运行
SQL 代码
-- Create a table for public profiles
create table profiles (
  id uuid references auth.users not null primary key,
  updated_at timestamp with time zone,
  username text unique,
  full_name text,
  avatar_url text,
  website text,

  constraint username_length check (char_length(username) >= 3)
);

-- Set up Row Level Security (RLS)
-- See https://Supabase.com/docs/guides/database/postgres/row-level-security for more details.
alter table profiles
  enable row level security;

create policy "Public profiles are viewable by everyone."
  on profiles for select
  using ( true );

create policy "Users can insert their own profile."
  on profiles for insert
  with check ( (select auth.uid()) = id );

create policy "Users can update own profile."
  on profiles for update
  using ( (select auth.uid()) = id );

-- This trigger automatically creates a profile entry when a new user signs up via Supabase Auth.
-- See https://Supabase.com/docs/guides/auth/managing-user-data#using-triggers for more details.
create function public.handle_new_user()
returns trigger as $$
begin
  insert into public.profiles (id, full_name, avatar_url)
  values (new.id, new.raw_user_meta_data->>'full_name', new.raw_user_meta_data->>'avatar_url');
  return new;
end;
$$ language plpgsql security definer;

create trigger on_auth_user_created
  after insert on auth.users
  for each row execute procedure public.handle_new_user();

-- Set up Storage!
insert into storage.buckets (id, name)
  values ('avatars', 'avatars');

-- Set up access controls for storage.
-- See https://Supabase.com/docs/guides/storage/security/access-control#policy-examples for more details.
create policy "Avatar images are publicly accessible."
  on storage.objects for select
  using ( bucket_id = 'avatars' );

create policy "Anyone can upload an avatar."
  on storage.objects for insert
  with check ( bucket_id = 'avatars' );

create policy "Anyone can update their own avatar."
  on storage.objects for update
  using ( (select auth.uid()) = owner )
  with check ( bucket_id = 'avatars' );
Get the API keys# 获取 API 密钥#
Go to the API Settings page in the Dashboard. 前往仪表板中的 API 设置页面。
Find your Project URL, anon, and service_role keys on this page. 在此页面上找到您的项目 URL , anon 和 service_role 键。
Building the app# 构建应用#
Initialize a Next.JS app# 初始化一个 Next.JS 应用#
初始化 Next.JS 项目
npx create-next-app@latest --use-npm Supabase-nextJS进入目录
cd Supabase-nextJS安装 Supabase 客户端
npm install @Supabase/Supabase-JS创建 env.local 保存变量
NEXT_PUBLIC_Supabase_URL=YOUR_Supabase_URL
NEXT_PUBLIC_Supabase_ANON_KEY=YOUR_Supabase_ANON_KEY
成功安装
保存变量

Supabase Server-Side Auth# Supabase 服务器端身份验证
为了更好地与框架集成,我们创建了 @Supabase/ssr 包用于服务器端认证。它包含所有快速配置您的 Supabase 项目使用 cookies 存储用户会话的功能。
Install the package for Next.JS.安装 Next.JS 的包
npm install @Supabase/ssr成功安装
Supabase utilities# Supabase 工具集#
Supabase 中有两种不同类型的客户端:
client.JS 客户端组件 - 从运行在浏览器中的客户端组件访问 Supabase。
import { createBrowserClient } from '@Supabase/ssr'

export function createClient() {
  // Create a Supabase client on the browser with project's credentials
  return createBrowserClient(
    process.env.NEXT_PUBLIC_Supabase_URL,
    process.env.NEXT_PUBLIC_Supabase_ANON_KEY,
  )
}
server.JS 服务器组件 - 从运行在服务器上的服务器组件、服务器操作和路由处理程序访问 Supabase。
import { createServerClient } from '@Supabase/ssr'
import { cookies } from 'next/headers'

export async function createClient() {
  const cookieStore = await cookies()

  // Create a server's Supabase client with newly configured cookie,
  // which could be used to maintain user's session
  return createServerClient(
    process.env.NEXT_PUBLIC_Supabase_URL,
    process.env.NEXT_PUBLIC_Supabase_ANON_KEY,
    {
      cookies: {
        getAll() {
          return cookieStore.getAll()
        },
        setAll(cookiesToSet) {
          try {
            cookiesToSet.forEach(({ name, value, options }) =>
              cookieStore.set(name, value, options)
            )
          } catch {
            // The `setAll` method was called from a Server Component.
            // This can be ignored if you have middleware refreshing
            // user sessions.
          }
        },
      },
    }
  )
}
创建以下必要的工具文件以创建客户端,并将它们组织在项目根目录的 utils/Supabase 中
创建 utils/Supabase 文件夹

创建两个文件,并复制代码·
Next.JS middleware# Next.JS 中间件#
创建一个位于项目根目录的 middleware.JS 文件,
import { updateSession } from '@/utils/Supabase/middleware'

export async function middleware(request) {
  // update user's auth session
  return await updateSession(request)
}

export const config = {
  matcher: [
    /*
     * Match all request paths except for the ones starting with:
     * - _next/static (static files)
     * - _next/image (image optimization files)
     * - favicon.ico (favicon file)
     * Feel free to modify this pattern to include more paths.
     */
    '/((?!_next/static|_next/image|favicon.ico|.*\\.(?:svg|png|jpg|jpeg|gif|webp)$).*)',
  ],
}
并在 utils/Supabase 文件夹内再创建一个。
import { createServerClient } from '@Supabase/ssr'
import { NextResponse } from 'next/server'

export async function updateSession(request) {
  let SupabaseResponse = NextResponse.next({
    request,
  })

  const Supabase = createServerClient(
    process.env.NEXT_PUBLIC_Supabase_URL,
    process.env.NEXT_PUBLIC_Supabase_ANON_KEY,
    {
      cookies: {
        getAll() {
          return request.cookies.getAll()
        },
        setAll(cookiesToSet) {
          cookiesToSet.forEach(({ name, value, options }) =>
            request.cookies.set(name, value)
          )

          SupabaseResponse = NextResponse.next({
            request,
          })

          cookiesToSet.forEach(({ name, value, options }) =>
            SupabaseResponse.cookies.set(name, value, options)
          )
        },
      },
    }
  )

  // refreshing the auth token
  await Supabase.auth.getUser()

  return SupabaseResponse
}
utils/Supabase 文件包含更新会话的逻辑。这个文件被 middleware.JS 文件使用,这是 Next.JS 的一个约定。
Set up a login page# 设置登录页面#
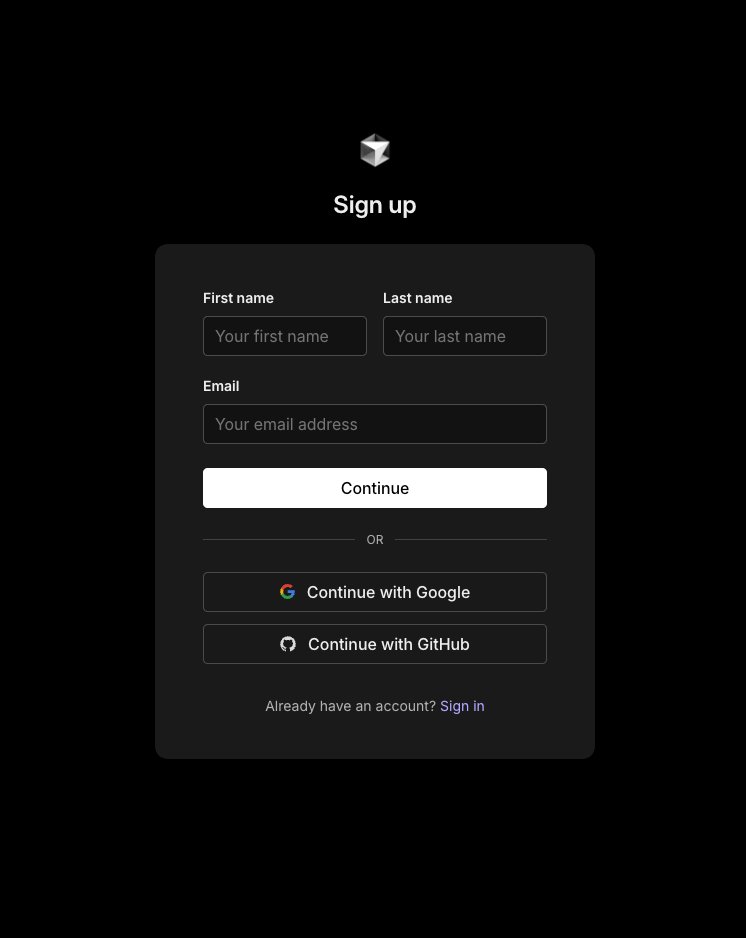
Login and signup form# 登录和注册表单
在 app 文件夹中,创建一个名为 login 的新文件夹,其中包含一个 page.JSx 文件,用于登录/注册表单。
import { login, signup } from './actions'

export default function LoginPage() {
  return (
    <form>
      <label htmlFor="email">Email:</label>
      <input id="email" name="email" type="email" required />

      <label htmlFor="password">Password:</label>
      <input id="password" name="password" type="password" required />

      <button formAction={login}>Log in</button>
      <button formAction={signup}>Sign up</button>
    </form>
  )
}
在 login 的新文件夹,创建 actions.JSx
'use server'

import { revalidatePath } from 'next/cache'
import { redirect } from 'next/navigation'
import { createClient } from '@/utils/Supabase/server'

export async function login(formData) {
  const Supabase = await createClient()

  // type-casting here for convenience
  // in practice, you should validate your inputs
  const data = {
    email: formData.get('email'),
    password: formData.get('password'),
  }

  const { error } = await Supabase.auth.signInWithPassword(data)

  if (error) {
    redirect('/error')
  }

  revalidatePath('/', 'layout')
  redirect('/account')
}

export async function signup(formData) {
  const Supabase = await createClient()

  const data = {
    email: formData.get('email'),
    password: formData.get('password'),
  }

  const { error } = await Supabase.auth.signUp(data)

  if (error) {
    redirect('/error')
  }

  revalidatePath('/', 'layout')
  redirect('/account')
}
在 app 文件中,创建 error 文件夹,在 error 文件夹中创建 page.JSx 文件
export default function ErrorPage() {
  return <p>Sorry, something went wrong</p>
}
运行开发环境
进入 3000/login
当您输入您的电子邮件和密码时,您将收到一封标题为"确认您的注册"的电子邮件。恭喜 🎉!!!
Email template# 邮件模板#
将电子邮件模板修改为支持发送令牌哈希:
Go to the Auth templates page in your dashboard. 前往仪表板中的身份验证模板页面。
选择 Confirm signup 模板。
将
{{ .ConfirmationURL }}改为
{{ .SiteURL }}/auth/confirm?token_hash={{ .TokenHash }}&type=email修改为:
将
{{ .ConfirmationURL }}改为
{{ .SiteURL }}/auth/confirm?token_hash={{ .TokenHash }}&type=email
Confirmation endpoint# 确认端点#
获取 Supabase Auth 服务器返回的代码,使用 token_hash 查询参数。
用此代码交换会话,我们将其存储在我们选择的存储机制中(在这种情况下,为 cookie)。
最后,我们将用户重定向到 account 页面。
在app中,创建 auth/confirm 文件夹,创建route.JS 文件
import { NextResponse } from 'next/server'
import { createClient } from '@/utils/Supabase/server'

// Creating a handler to a GET request to route /auth/confirm
export async function GET(request) {
  const { searchParams } = new URL(request.url)
  const token_hash = searchParams.get('token_hash')
  const type = searchParams.get('type')
  const next = '/account'

  // Create redirect link without the secret token
  const redirectTo = request.nextUrl.clone()
  redirectTo.pathname = next
  redirectTo.searchParams.delete('token_hash')
  redirectTo.searchParams.delete('type')

  if (token_hash && type) {
    const Supabase = await createClient()

    const { error } = await Supabase.auth.verifyOtp({
      type,
      token_hash,
    })

    if (!error) {
      redirectTo.searchParams.delete('next')
      return NextResponse.redirect(redirectTo)
    }
  }

  // return the user to an error page with some instructions
  redirectTo.pathname = '/error'
  return NextResponse.redirect(redirectTo)
}
Account page# 账户页面#
用户登录后,我们可以允许他们编辑个人资料详情和管理账户。 在 app/account 文件夹中创建一个新组件,命名为 AccountForm.JSx
'use client'

import { useCallback, useEffect, useState } from 'react'
import { createClient } from '@/utils/Supabase/client'

export default function AccountForm({ user }) {
  const Supabase = createClient()
  const [loading, setLoading] = useState(true)
  const [fullname, setFullname] = useState(null)
  const [username, setUsername] = useState(null)
  const [website, setWebsite] = useState(null)
  const [avatar_url, setAvatarUrl] = useState(null)

  const getProfile = useCallback(async () => {
    try {
      setLoading(true)

      const { data, error, status } = await Supabase
        .from('profiles')
        .select(`full_name, username, website, avatar_url`)
        .eq('id', user?.id)
        .single()

      if (error && status !== 406) {
        throw error
      }

      if (data) {
        setFullname(data.full_name)
        setUsername(data.username)
        setWebsite(data.website)
        setAvatarUrl(data.avatar_url)
      }
    } catch (error) {
      alert('Error loading user data!')
    } finally {
      setLoading(false)
    }
  }, [user, Supabase])

  useEffect(() => {
    getProfile()
  }, [user, getProfile])

  async function updateProfile({ username, website, avatar_url }) {
    try {
      setLoading(true)

      const { error } = await Supabase.from('profiles').upsert({
        id: user?.id,
        full_name: fullname,
        username,
        website,
        avatar_url,
        updated_at: new Date().toISOString(),
      })

      if (error) throw error
      alert('Profile updated!')
    } catch (error) {
      alert('Error updating the data!')
    } finally {
      setLoading(false)
    }
  }

  return (
    <div className="form-widget">
      <div>
        <label htmlFor="email">Email</label>
        <input id="email" type="text" value={user?.email} disabled />
      </div>

      <div>
        <label htmlFor="fullName">Full Name</label>
        <input
          id="fullName"
          type="text"
          value={fullname || ''}
          onChange={(e) => setFullname(e.target.value)}
        />
      </div>

      <div>
        <label htmlFor="username">Username</label>
        <input
          id="username"
          type="text"
          value={username || ''}
          onChange={(e) => setUsername(e.target.value)}
        />
      </div>

      <div>
        <label htmlFor="website">Website</label>
        <input
          id="website"
          type="url"
          value={website || ''}
          onChange={(e) => setWebsite(e.target.value)}
        />
      </div>

      <div>
        <button
          className="button primary block"
          onClick={() => updateProfile({ fullname, username, website, avatar_url })}
          disabled={loading}
        >
          {loading ? 'Loading ...' : 'Update'}
        </button>
      </div>

      <div>
        <form action="/auth/signout" method="post">
          <button className="button block" type="submit">
            Sign out
          </button>
        </form>
      </div>
    </div>
  )
}
创建 app/account/page.JSx
import AccountForm from './account-form'
import { createClient } from '@/utils/Supabase/server'

export default async function Account() {
  const Supabase = await createClient()

  const { data: { user } } = await Supabase.auth.getUser()

  return <AccountForm user={user} />
}
Sign out# 登出#
让我们创建一个路由处理程序来处理从服务器端的注销。确保首先检查用户是否已登录!
创建 app/auth/signout/route.JS
import { createClient } from '@/utils/Supabase/server'
import { revalidatePath } from 'next/cache'
import { NextResponse } from 'next/server'

export async function POST(req) {
  const Supabase = await createClient()

  // Check if a user's logged in
  const { data: { user } } = await Supabase.auth.getUser()

  if (user) {
    await Supabase.auth.signOut()
  }

  revalidatePath('/', 'layout')
  return NextResponse.redirect(new URL('/login', req.url), {
    status: 302,
  })
}
启动开发环境
Bonus: Profile photos# 奖励:个人照片#
Create an upload widget# 创建上传组件#
让我们创建一个用户头像小部件,以便用户可以上传个人照片。我们可以从创建一个新的组件开始:
创建 app/account/avatar.JSx
'use client'

import React, { useEffect, useState } from 'react'
import { createClient } from '@/utils/Supabase/client'
import Image from 'next/image'

export default function Avatar({ uid, url, size, onUpload }) {
  const Supabase = createClient()
  const [avatarUrl, setAvatarUrl] = useState(url)
  const [uploading, setUploading] = useState(false)

  useEffect(() => {
    async function downloadImage(path) {
      try {
        const { data, error } = await Supabase
          .storage
          .from('avatars')
          .download(path)

        if (error) {
          throw error
        }

        const url = URL.createObjectURL(data)
        setAvatarUrl(url)
      } catch (error) {
        console.log('Error downloading image: ', error)
      }
    }

    if (url) {
      downloadImage(url)
    }
  }, [url, Supabase])

  const uploadAvatar = async (event) => {
    try {
      setUploading(true)

      if (!event.target.files || event.target.files.length === 0) {
        throw new Error('You must select an image to upload.')
      }

      const file = event.target.files[0]
      const fileExt = file.name.split('.').pop()
      const filePath = `${uid}-${Math.random()}.${fileExt}`

      const { error: uploadError } = await Supabase
        .storage
        .from('avatars')
        .upload(filePath, file)

      if (uploadError) {
        throw uploadError
      }

      onUpload(filePath)
    } catch (error) {
      alert('Error uploading avatar!')
    } finally {
      setUploading(false)
    }
  }

  return (
    <div>
      {avatarUrl ? (
        <Image
          width={size}
          height={size}
          src={avatarUrl}
          alt="Avatar"
          className="avatar image"
          style={{
            height: size,
            width: size,
          }}
        />
      ) : (
        <div
          className="avatar no-image"
          style={{
            height: size,
            width: size,
          }}
        />
      )}
      <div style={{ width: size }}>
        <label className="button primary block" htmlFor="single">
          {uploading ? 'Uploading ...' : 'Upload'}
        </label>
        <input
          style={{
            visibility: 'hidden',
            position: 'absolute',
          }}
          type="file"
          id="single"
          accept="image/*"
          onChange={uploadAvatar}
          disabled={uploading}
        />
      </div>
    </div>
  )
}
然后我们可以将小部件添加到 AccountForm 组件中:
// Import the new component
import Avatar from './avatar'

// ...
return (
  <div className="form-widget">
    {/* Add to the body */}
    <Avatar
      uid={user?.id}
      url={avatar_url}
      size={150}
      onUpload={(url) => {
        setAvatarUrl(url)
        updateProfile({ fullname, username, website, avatar_url: url })
      }}
    />
    {/* ... */}
  </div>
)
更新主页,查看效果
更新 app/page.JSx 代码
import Link from 'next/link'
export default function Home() {
return (
<div className="min-h-screen flex flex-col items-center justify-center bg-gray-50 py-12 px-4 sm:px-6 lg:px-8">
<div className="max-w-md w-full space-y-8">
<div>
<h1 className="mt-6 text-center text-3xl font-extrabold text-gray-900">
Welcome to Our App
</h1>
<p className="mt-2 text-center text-sm text-gray-600">
Please sign in to continue
</p>
</div>
<div className="mt-8 space-y-6">
<Link
href="/login"
className="group relative w-full flex justify-center py-2 px-4 border border-transparent text-sm font-medium rounded-md text-white bg-blue-600 hover:bg-blue-700 focus:outline-none focus:ring-2 focus:ring-offset-2 focus:ring-blue-500"
>
Sign in
</Link>
</div>
</div>
</div>
)
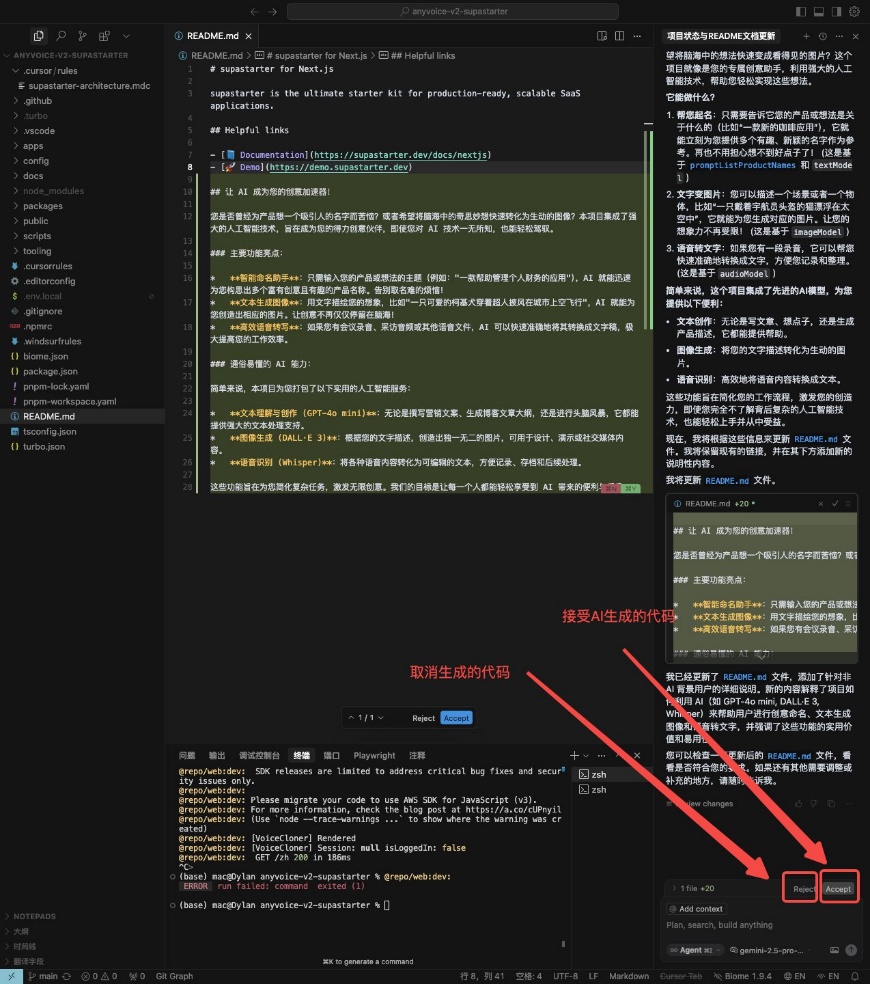
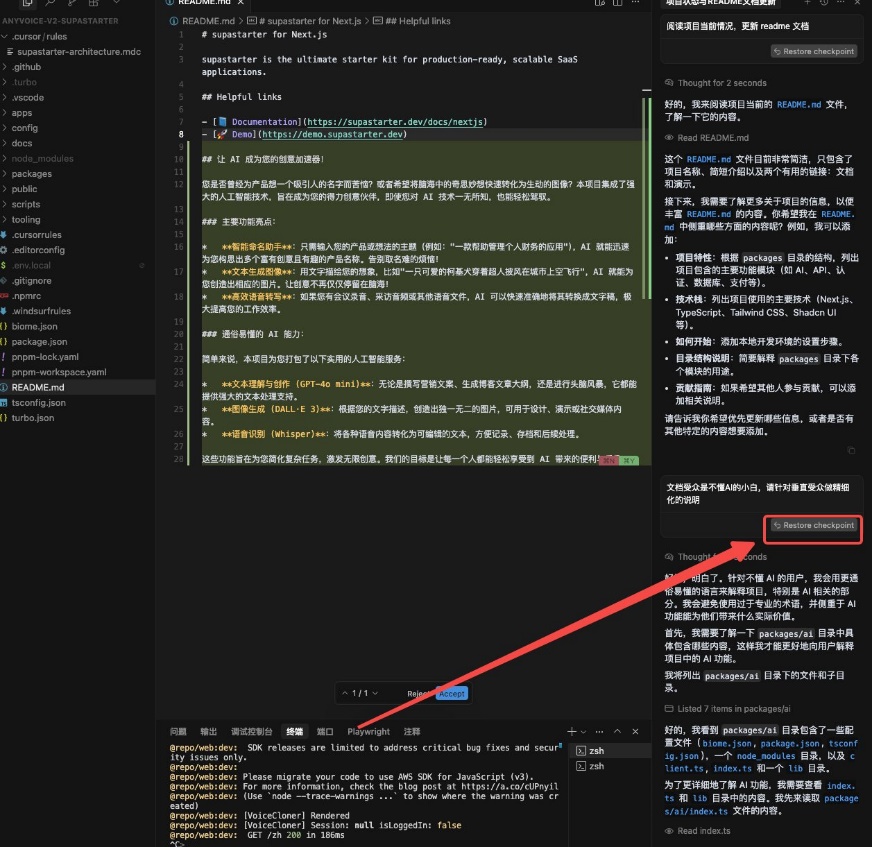
}让 Cursor 优化下页面布局
常见疑问
问题
答案
期待你的提问,可在此直接评论